Showing posts with label Knapford. Show all posts

Wednesday, December 24, 2014

Tool Sheds #3: Yard & Quarry Huts

During the summer I was able to get back into making some more structures for the yard scenes, and here are a selection you may recognize from some of the newer and classic seasons of the Thomas show.


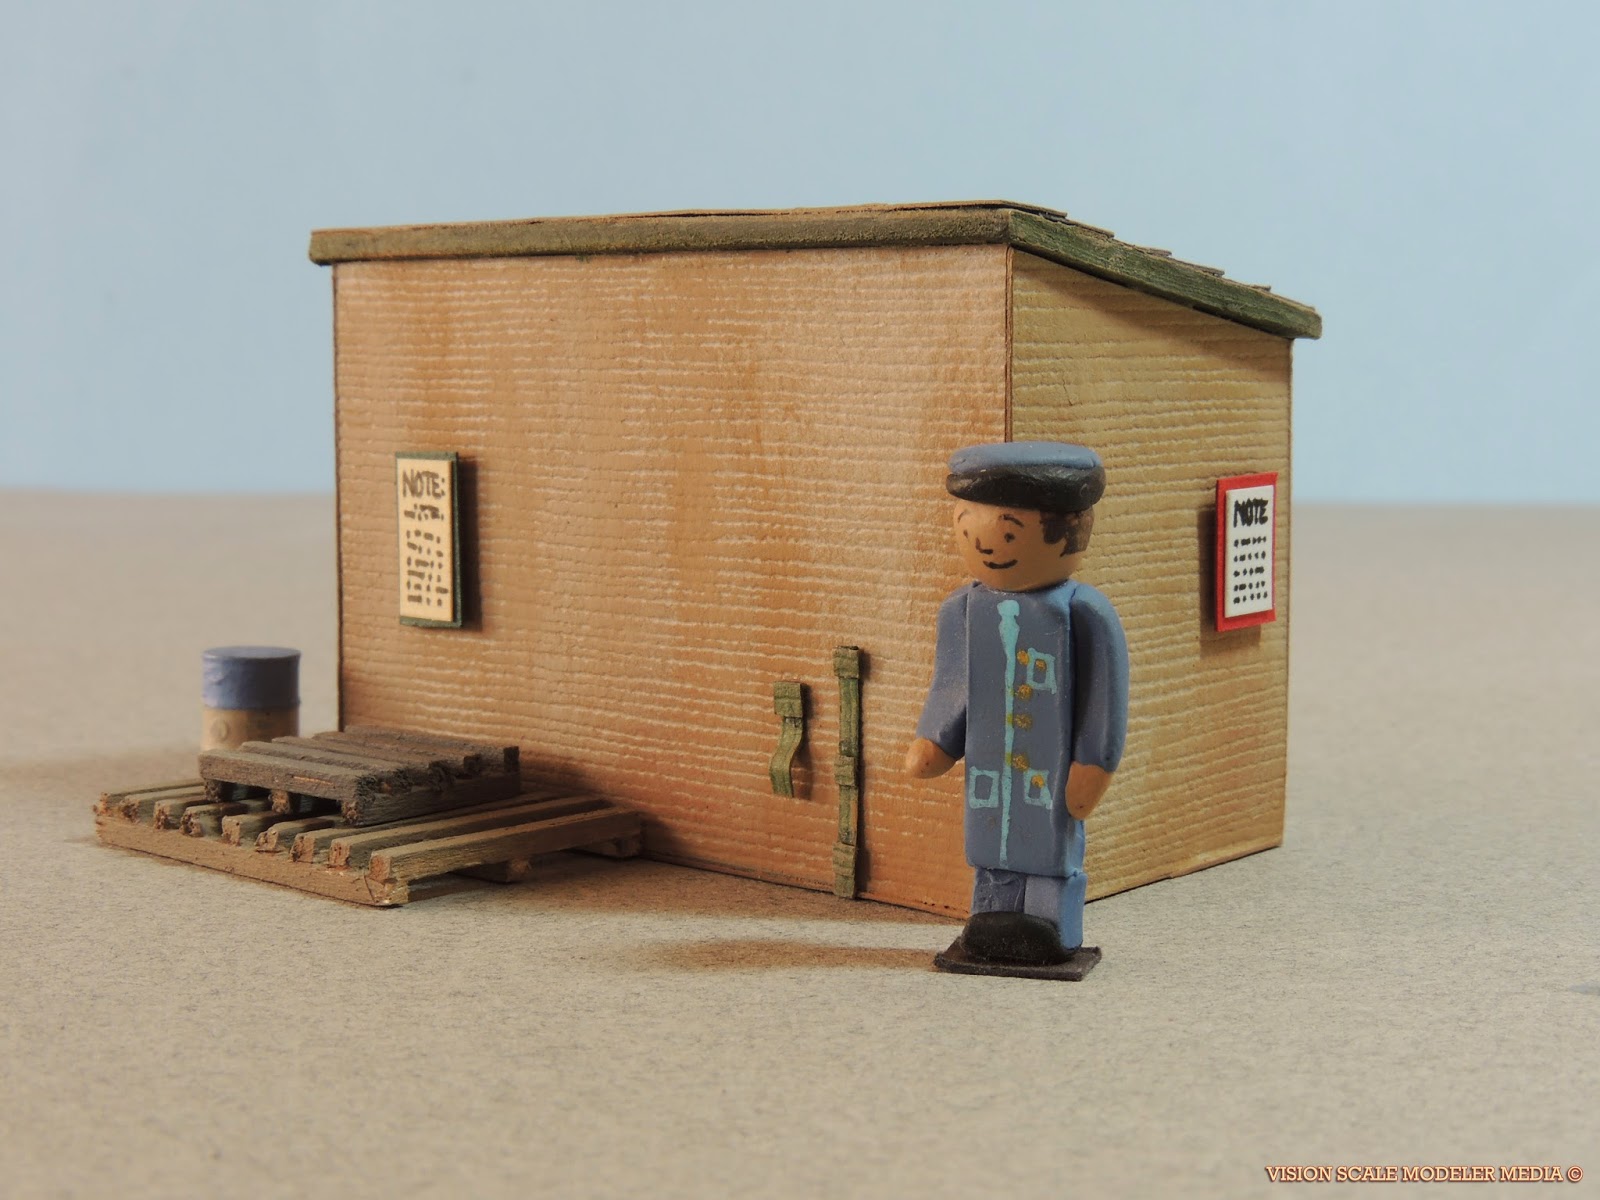
Here is the first one, a little yard office often seen from season 6, the collection of structures that were made since Thomas and The Magic Railroad. This building has also been seen at the quarry and Brendam Docks.

Since modeling the Knapford Goods Shed, I make singles from scratch using layered strips of cut textured card glued on the top for the roof, painted and weathered. I also used craft wire to make the drain ducts, with strips of paper wrapped and glued for the ribbons. Mounted on the walls are notices, and a work a force announcement for the crews at the back for extra detail.


Here is a small tool shed, often seen by refueling equipment next to the water columns and coal bunkers, weathered in a little dust for the quarry dioramas where there is a lot of gravel or sand.


You might recognize this one! This structure was made for the dioramas seen in seasons 1 and 2. The first batch of Wooden Railway buildings had included this structure along with the Tidmouth Signal Box. I also have a water hose-pipe at the back for when the structure is a stand-alone in the middle of a yard when not a lean-on next to a wall. There are also more notices and some scratch-built skids.

All of these buildings have hollow spaces underneath to add lights for filming the dioramas at night. I feel every time I try making more of these classic structures, keeping in mind everything I learned reading scale modeling magazines and websites, these buildings keep getting better and better. And that of course makes me very pleased indeed.

Thursday, January 9, 2014

Tool Sheds #2: Platelayers Hut


A newly completed plate-layer's hut at Tidmoth's Shunting Yards! This was a nice building to make, taking only a day to construct it and weather it, with a few nice accessories to share for this post.


For this tool shed, I wanted to make a building that could add interest in the yard. In addition to  experimenting more with my mix of brick colors, and adding a sloped gable-overhang to the shingled roof, I wanted to make some eye-catching details. In these pictures, I added posters on the sides, one for a notice and a timetable, each with cream paper and hunter green trim. I have them attached with rolled scotch tape so I could rearrange them.


I am especially happy with making these scratch-built fire buckets! At yards and stations, they are full of ether sand or water to put out fires or for other emergencies. I rolled a thin strip of card-stock around a brush handle and glued it to make the side of the bucket, then glued on a thin strip for the lip of the bucket, and the handles. I also glued it on a strip of paper and cut it for the base.


Two of the buckets are hung onto the wall of the shed with painted toothpick ends. One of the separate buckets on the ground has its handles down, and for the other bucket, its handle is up for these workmen to use! 


For this shed, those red buckets and signs add a nice spark of color that can be pleasing to look at on the layout, and these small details give buildings their own character and charm.


Until next time!

Wednesday, August 14, 2013

Workman's Office #1


This is a building commonly seen at Tidmoth Sheds, Brendam, and Knapford Yards, well known for its large windows. I have been planning to make more structures seen in these locations by drawing their dimensions in my sketchbook, so in addition to the Knapford Goods Shed, here is the Workman's Hut.


As usual, it's made from Bazzill's textured card-stock paper, but this was when I began painting the paper and other parts in better, custom colors. Long pieces of balsa wood made the long, narrow structure shell bond together with extra strength, and smaller strips to glue the sides.

By the way, the decorative spikes on the gable is a toothpick cut in two!


At the yards and docks, dust and dry dirt stuck on the building's foundations and brick walls, so I used dry-brushing to realistically generate this weathering effect, using tans and light earth-toned colors mixed with the brick color for the walls.

The windows have clear plastic for the glass, super-glued to the back of the paper window panes to simulate glass. I found in the process of brushing thacross the whole front facade, the paint caught the doors as well as the window glass. I rather liked this effect, and although this building might be recently built, it was still exposed to aging and getting dusted by the trains or lorries passing by, the dust getting kicked onto the facade.


Similarly to the Open-Aired Shed, I created the roof using strips of card, cut in varying length, and glued them to be overlapped as steel planks.


Finally for the back, I have seen a rare photo of the building having only one door on this side, so I also added a drain pipe for the gutters.

I have also glued the building on a strip of card stock with a hollow rectangular opening, so I could install LED lights for nighttime scenes.

More coming soon!

Thursday, July 25, 2013

Knapford Station Goods Shed

I have been waiting to post this newly completed project! A few days ago I completed my new and most favorite building for my future layout, a goods shed commonly scene in Thomas's classic episodes.


Completely scratch built, as usual, it is made out of textured card-stock and balsa wood, but I feel this structure is special as I used a number of new model-making techniques that I wish to share with you, and a little background of the prop's history on the Thomas Show.

You will find this shed in the sidings that run parallel to Knapford Station. If you look carefully, from season 1 to 5, this shed had a wall in the back, some drain pipes, and there are a few differences in the structure's design.

In the production of "Thomas and the Magic Railroad," many of the buildings commonly used on the sets through the years were remodeled, remolded, and painted very realistically, including this shed. It noticeably gained some faded green roof frames with gables and braces, as well as the brick reliefs on the side of the outside wall.

I found that I liked this look better, so I based construction on how this shed looked then onwards. The shed first housed two tracks, probably as a 2-stall goods shed for only 2 cars (maybe for the mail cars perhaps?), then only one, probably as a spare single stall engine shed. Both Diesel 10 and Donald have been seen when the set was made this way.


In this post I want to pin up my detailed drawing of the goods shed. Recently I have been practicing making a measured sketch of every building I want to make, pages of them, from tool sheds to stations and mostly warehouses and sheds. I find that sometimes I have to sketch different versions as I feel the measurements can be changed or are not accurate to the original or reality.


In this case I found the width of the entrance to be too narrow to have two tracks as I cut the textured card out to piece together. The Bachmann Percy model has the widest clearance space compared to the other engines as his footplates are spaced quite far from the chassis (I'm not sure the width of Diesel's though, as he is on my wish list...). So I simply made the adjustments as I redrew the measurements on the card to be cut for the shed's walls. I also decided to exclude the molding on the roof as there isn't any on the original. Photographed is the finished product.


A thick piece of balsa wood serves to add thickness to the wall and extra strength, much better than just the fragile card super-glued on the edges! I used wood and layered paper to create the relief wall and arches, and the four reliefs you see with the added tiles.


Thick strips of card was used here to construct the vent structure on top of the roof. If an engine uses this shed at night or is just passing through, these vents allow the smoke exhaust to escape the shed.


Here I wanted to try and make the roof removable, so I could fit this spare piece of balsa to mount LED shed lamps in the future.


When the time comes to make the diorama or layout of Knapford, I can have holes drilled to mount the lights and then have them wired.

The wires would be fed under the table and connected to a small power box, but I hope there can be a way to do that without the building being permanently glued to the table for showings.


There is a great book called "The Encyclopedia of Model-Making Techniques" by Christopher Payne, and I recommend this book for beginner and professional scale modellers.

In it there is a great tip on how to make tiles using strips of card with slits cut with a craft knife. Many railway layouts use this technique in the British Isles, and as I did want to model the shingles in 3D, I thought I would have a go. The results look fantastic and very convincing once dry-brushed.

I am very happy with it; it takes a while but a little time can produce a better model whatever your subject!


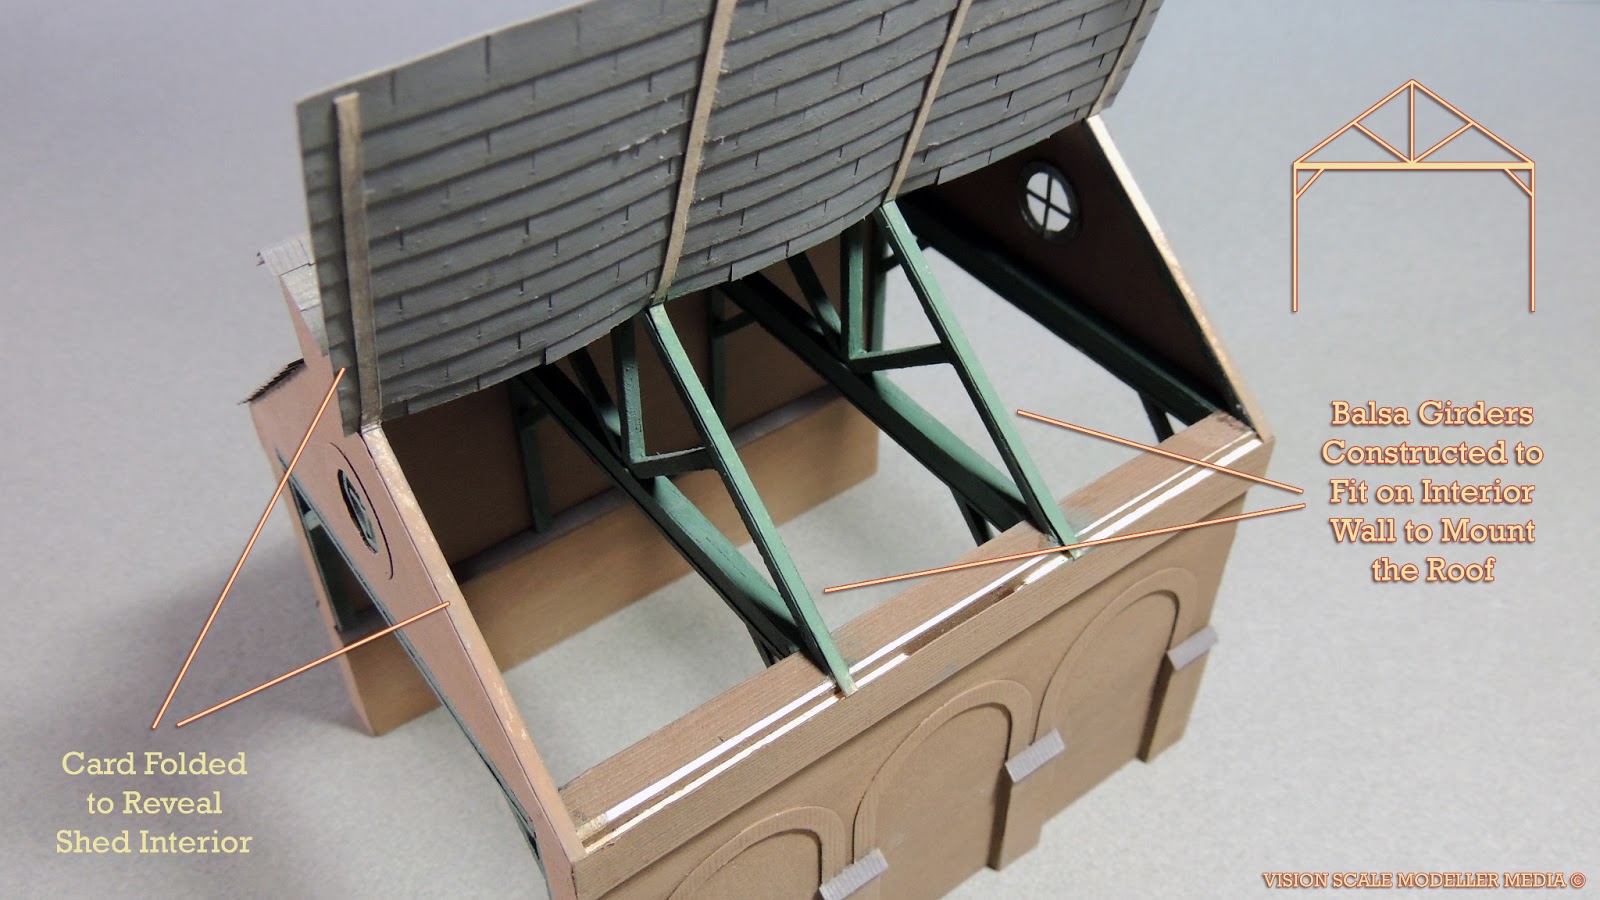
On top of that, I glued one side onto card strips so you could open it and see the interior. Here I made the sections of gables that support the roof, all from painted balsa wood.

This will also make it easier to wire the lights and fasten the wire onto the wall to make it appear realistically wired as it would be in real life.


Here is a look inside looking up into the gables. This would be a great prop to film on the diorama for close ups of the engines.


I really wanted to take my time and do my very best with this building, and I think compared to some of the other buildings I have posted, this is by far the best one so far. Thomas is a great inspiration, and a prime example of fine scale modelling.


Finally here it is on my table with some other props to show you how it looks on set. It is a quick set up and not as detailed, but it does show you the stuff I've been making for the past few months in my summer holiday from college.

Feel free to post some feedback. Comments and suggestions are welcome!

Monday, June 3, 2013

My Workbench

To keep interest going for my blog, I am going to post pictures and sketches of my old model railroad and some plans for future projects. I know that fans comment on how much they like the tests and sets I have made on my YouTube channel, so I hope you come and see my ideas and tips on a daily/weekly basis, and enjoy the pages you see and read!


Here is a picture I took of my work space in my room, for creating art for college and my scale modeling! You can see Sir Handel, a Knapford goods shed, some freshly painted freight cars, and other projects I have done for the past few years.

Pictured are also the common tools I use:
  • a cutting mat
  • pencils
  • craft knife and Atlas track knife
  • scissors
  • rulers and templates
  • Scotch tape, white glue and Crazy glue
  • acrylic paint
  • technical pencil and pencil lead
  • gel pens
  • pencil sharpener
 You can see the posts I have in order of my projects in the Workbench pages I have at the top of the blog panel, check them out to see the engines buildings and other cool stuff made!

More posts coming soon.