Showing posts with label Scenics. Show all posts

Wednesday, December 24, 2014

Tool Sheds #3: Yard & Quarry Huts

During the summer I was able to get back into making some more structures for the yard scenes, and here are a selection you may recognize from some of the newer and classic seasons of the Thomas show.


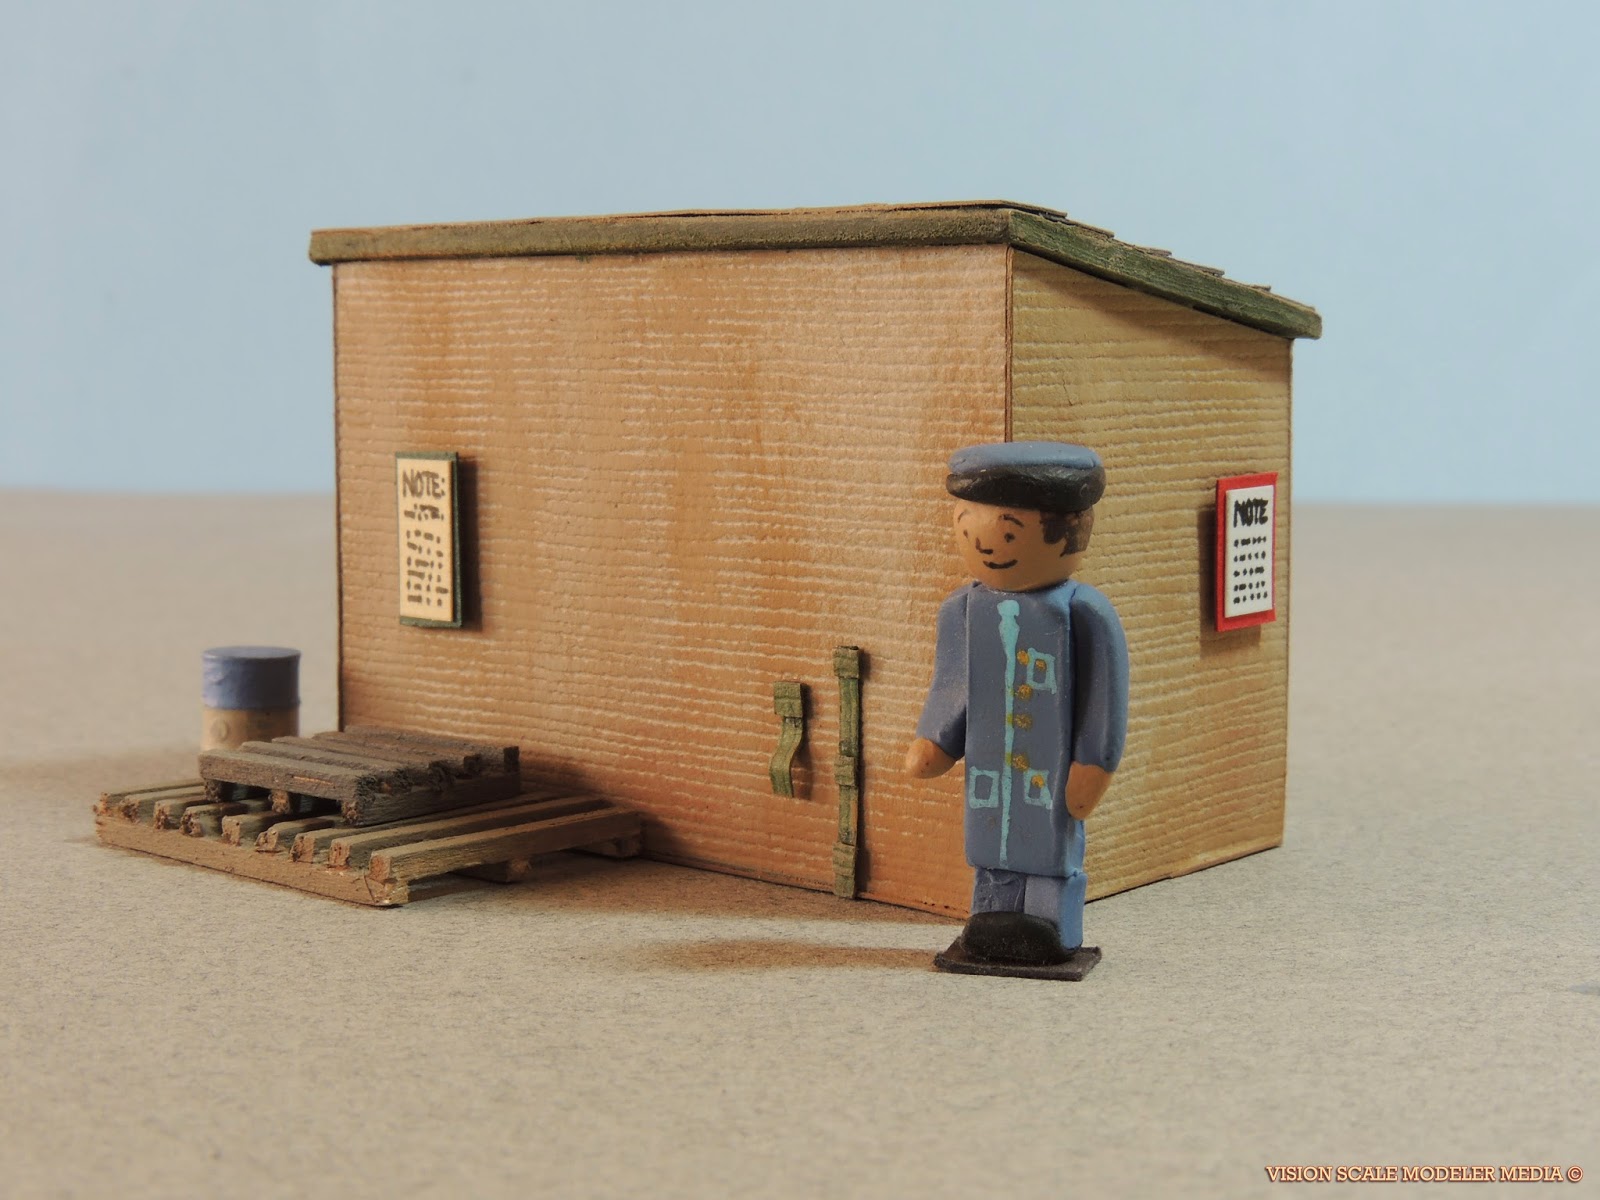
Here is the first one, a little yard office often seen from season 6, the collection of structures that were made since Thomas and The Magic Railroad. This building has also been seen at the quarry and Brendam Docks.

Since modeling the Knapford Goods Shed, I make singles from scratch using layered strips of cut textured card glued on the top for the roof, painted and weathered. I also used craft wire to make the drain ducts, with strips of paper wrapped and glued for the ribbons. Mounted on the walls are notices, and a work a force announcement for the crews at the back for extra detail.


Here is a small tool shed, often seen by refueling equipment next to the water columns and coal bunkers, weathered in a little dust for the quarry dioramas where there is a lot of gravel or sand.


You might recognize this one! This structure was made for the dioramas seen in seasons 1 and 2. The first batch of Wooden Railway buildings had included this structure along with the Tidmouth Signal Box. I also have a water hose-pipe at the back for when the structure is a stand-alone in the middle of a yard when not a lean-on next to a wall. There are also more notices and some scratch-built skids.

All of these buildings have hollow spaces underneath to add lights for filming the dioramas at night. I feel every time I try making more of these classic structures, keeping in mind everything I learned reading scale modeling magazines and websites, these buildings keep getting better and better. And that of course makes me very pleased indeed.

Friday, January 3, 2014

Tips for Realistic Track: #2: Overgrowth


Once I made a small diorama for an old disused branchline, and I used some materials I'd like to share for creating some really old and overgrown sections of track on your layout.

In this picture, every scenic element is actually loose, not permanent! I wanted to create this on a wooden board to see what the track would look like with different scenic materials. Dried sand is used with sifted dirt, rocks found out in the yard and on the driveway in various courses, and some sprinkled ground foam from Woodland Scenics. In the corners of the photo are small twigs, moss, and lichen. This was very beautiful for and old section of Toby's tramway, this track running from the mountains down to the marketplace in the village.

So if your diorama or railway layout is going to be temporary or permanent, as I have stressed before, it is a good idea to do a little research and study from life, from photographs online to other model railroaders and their work. This will help you achieve the look you want.

Here are some links to somevery useful and successful scenic products you might know:

Sunday, December 29, 2013

How to Paint Realisic Track

From the helpful information I found from model railroading over the years, here are a few simple steps to help you create better track:


  1. Study photographs of tracks in books, model railroad magazines and online. Google search weathered tracks in sidings, main lines, old and new tracks, to achieve the look you want, based on the location of your section of the layout. Tracks from a quarry or an old siding might look very different from tracks from the main lines!
  2. Using track cleaning fluid, rub it on the tops of the rails using a paper towel wrapped around your fingers.
  3. Paint the track with primer paint. It might be useful to paint the primer by hand for delicate track work such as turnouts.
  4. When dry, carefully rub and scrub the primer off the top and edges of the rail. Make sure the edges of the ends of the track rails are covered with tape or a track clip when you paint the primer, so they remain clean to carry the electricity!
  5. Paint the ties, using mixed colors of gray or brown, making sure to paint the sides of the rails.
  6. When it dries, dry-brush lighter shades of your chosen color, light gray or either tan or light brown, to give depth to the wood.
  7. For older track, paint the sides of the rails and spikes using terracotta or nutmeg colors. Remember it doesn't always have to be orange rust. You can mix terracotta or tan with your chosen tie color, or a lighter shade of the tie color.
  8. Later, weather sections of the track with dust, or rust on the spikes.
If the track will be permanent, use white glue mixed with a little water to thin it, and spray it on the track using a spray bottle or and eye dropper. After it dries, you can use scraped chalks or pastel powder to add dust, or soot and oil where the engines stop at the stations, the yard, or a hill when the train is working hard and drops oil on the rails. If temporary, like my layouts are, stick with using paint, and practice making permanent scenes or dioramas to prepare for larger layouts!

Tips for Realistic Track: #1: Basic Painting

I was looking at a few pieces of track the other day, and I thought I would take my paints out and detail my track again. Today I thought I'd take a few pictures to post.


I realized that the knowledge I have gained from looking at layout tips and tricks was helping me make my track look better, and more realistic. I have done this for years, but I wanted to see if improvements could be made.


I wanted to just try and paint one piece in just one color, a weathered gray. In this photo, this ballasted piece had peen sprayed with just a gray primer. After it dried, I rubbed off the paint from the top of the rails using a rubber track cleaner and a paper towel wrapped around a finger, then I used a track liquid cleaner to wash the rail surface from any grime. 

It looked nice enough. I have painted my track using dark brown, plus the side of the rails. This would be effective in killing that "toy" look from the tracks on your layout. But here the gray looked a little dull to me. So next I tried to detail the next piece, and I think it looks so much better:


Here is the result. For this older look, I painted this piece using sage, a light greenish gray.  This color would be perfect for the quarry or mine, such as Bill and Ben's Brendam Clay Pits, where the wood of the ties is very dry, brittle from the sea air, the rust covering the ties and rails, and the quarry dust creates the light rail color.

Next I used terracotta to paint the sides of the rails and even the spikes. This looks nice because it created the illusion of rust. Compared to newly laid track, which is often a dark brown, and even track that is aging out on the main lines, they still look brown, fading in lighter shades. But as you can see, track can tell the viewer a lot about where it has been laid, in this case a quarry or an old siding, how old the track is, and whether or not it has grass or foliage creeping up from the ballast.


I feel these extra steps makes the track look so much more realistic. There are times when I look at some amazing layouts and dioramas, I notice for instance that the buildings and the scenery are very meticulous and beautifully modeled, and no consideration was taken at all to do the same with the track. They are a crucial part of the scenery. Lines have the power to direct the eye around your scene. Results to this idea offer pleasing curves in and out of valleys and trees, villages and yards, and mountains. Finally, studying from life really helps you to decide how to paint your track based on condition and location. 


Looks like some workman are checking this cattle wagon's brakes and chassis for repair! I set up this small mockup on my desk to test how these tracks look ballasted.  These are Code 100 Atlas track, not that very appealing, but you see what a huge difference it makes when consideration to weathering and detailing your track rewards you for a better-looking railway.

Wednesday, May 15, 2013

Yard Structures and other Objects!

I made a few small props today, for the yards and sidings, to add some extra detail and interest. They are small but just as important as the bigger structures on any layout!


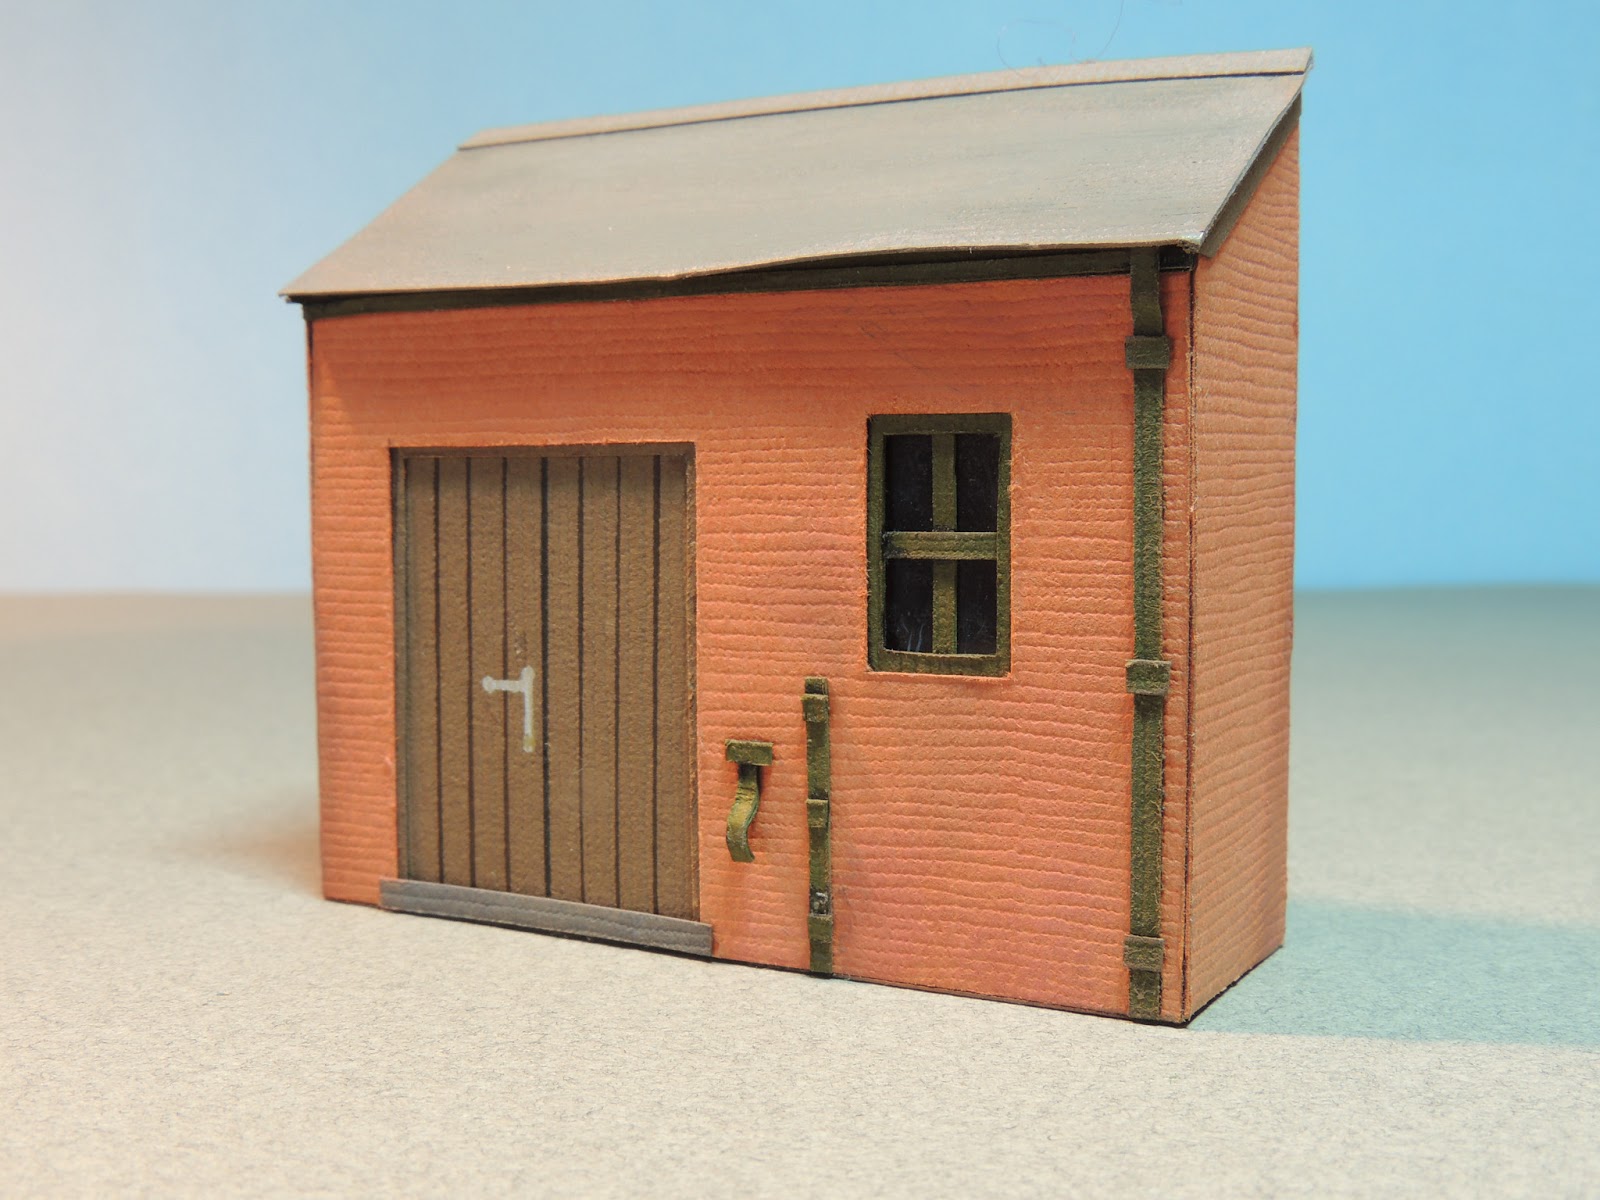
Here is another example of some buildings in direct reference to kits made by ether Bachmann or Hornby. This is a tool shed that leans against another structure or wall, equiped with bent card for the water hose spout and gutters! All is needed to make this is Bazzill Basics textured cardstock paper, with Balsa wood to strengthen it. This took me about forty minutes to make.


These tool sheds can be found near the track or the adjacent roads and walkways in-between the sidings, based on the two sheds included in Hornby's Coal Loader resin structure.


Here are some four sacks I made from scratch using Sculpy clay. I used a carving knife to cut rolled logs of the clay to pinch the ends in such a way that it looks like sown ends. I pinched the bags together in certain arrangements, some leaning up against another, and sorted stacks stacked differently for variety. It would be good to paint and weather them to kill the clay shine.

Saturday, April 20, 2013

Sculpted Scenic Figures: Large Scale

I make figures this size for my Large Scale Skarloey engines and for close-ups, such as cab or indoor scenes.


Here are both the HO/OO scale figure, and the Large scale, 16mm narrow gauge figure of the flagman for a comparison. These models are sculpted the same way as described in the previous post, though I find I have to add wire to the legs and head to make them stick together when baked. This also allows the head to rotate or turn as well, put separately together.


Here is Sir Topham Hatt in this size. I find I could add much more detail and expressions. I can have replaceable heads. You can see Sir Topham Hatt's different expressions on my homemade version of Something In the Air and Cranky Bugs!


Here are two farmers and a foreman. I could also place the legs together or farther apart.


Here is Jem Cole about to use the Telephone Box I made with card-stock, and clear plastic from an egg carton for the glass!


Here are the engine crew of Drivers and Firemen! I also found the heads look better with necks, the one on the far left being the best example.


Here is Skarloey, gleaming with the Railway Series color scheme, and his driver so you can see what he looks like leaning out from the cab. I can have both driver and firemen on board the footplate, and with the cab interiors fully modeled inside, I can film closeups with its detail and accuracy with the model, without having to make separate dioramas.


There is an insightful page on the Sodor Island Fansite Website, which is an interview with Alexandra Dawe. She is a model-maker from Seasons 6 - 10, who shares how the studio created the figures and props for 1 gauge and larger scales for closeups. I recommend reading these interviews for an inside look behind the scenes of Thomas and Friends, from the working experience and perspective of these extremely talented model-makers!

It is amazing to me how wonderfully these figures and engines come out, after years and years of making them, destroying them and salvaging parts to make better and more accurate versions. I believe I have come a long way, and I hope you can check this blog for more posts and pages, and comment on them too, so you can become inspired to make your own models.

Check out this page to see how I made Rheneas!

Sculpted Scenic Figures: HO/OO Scale


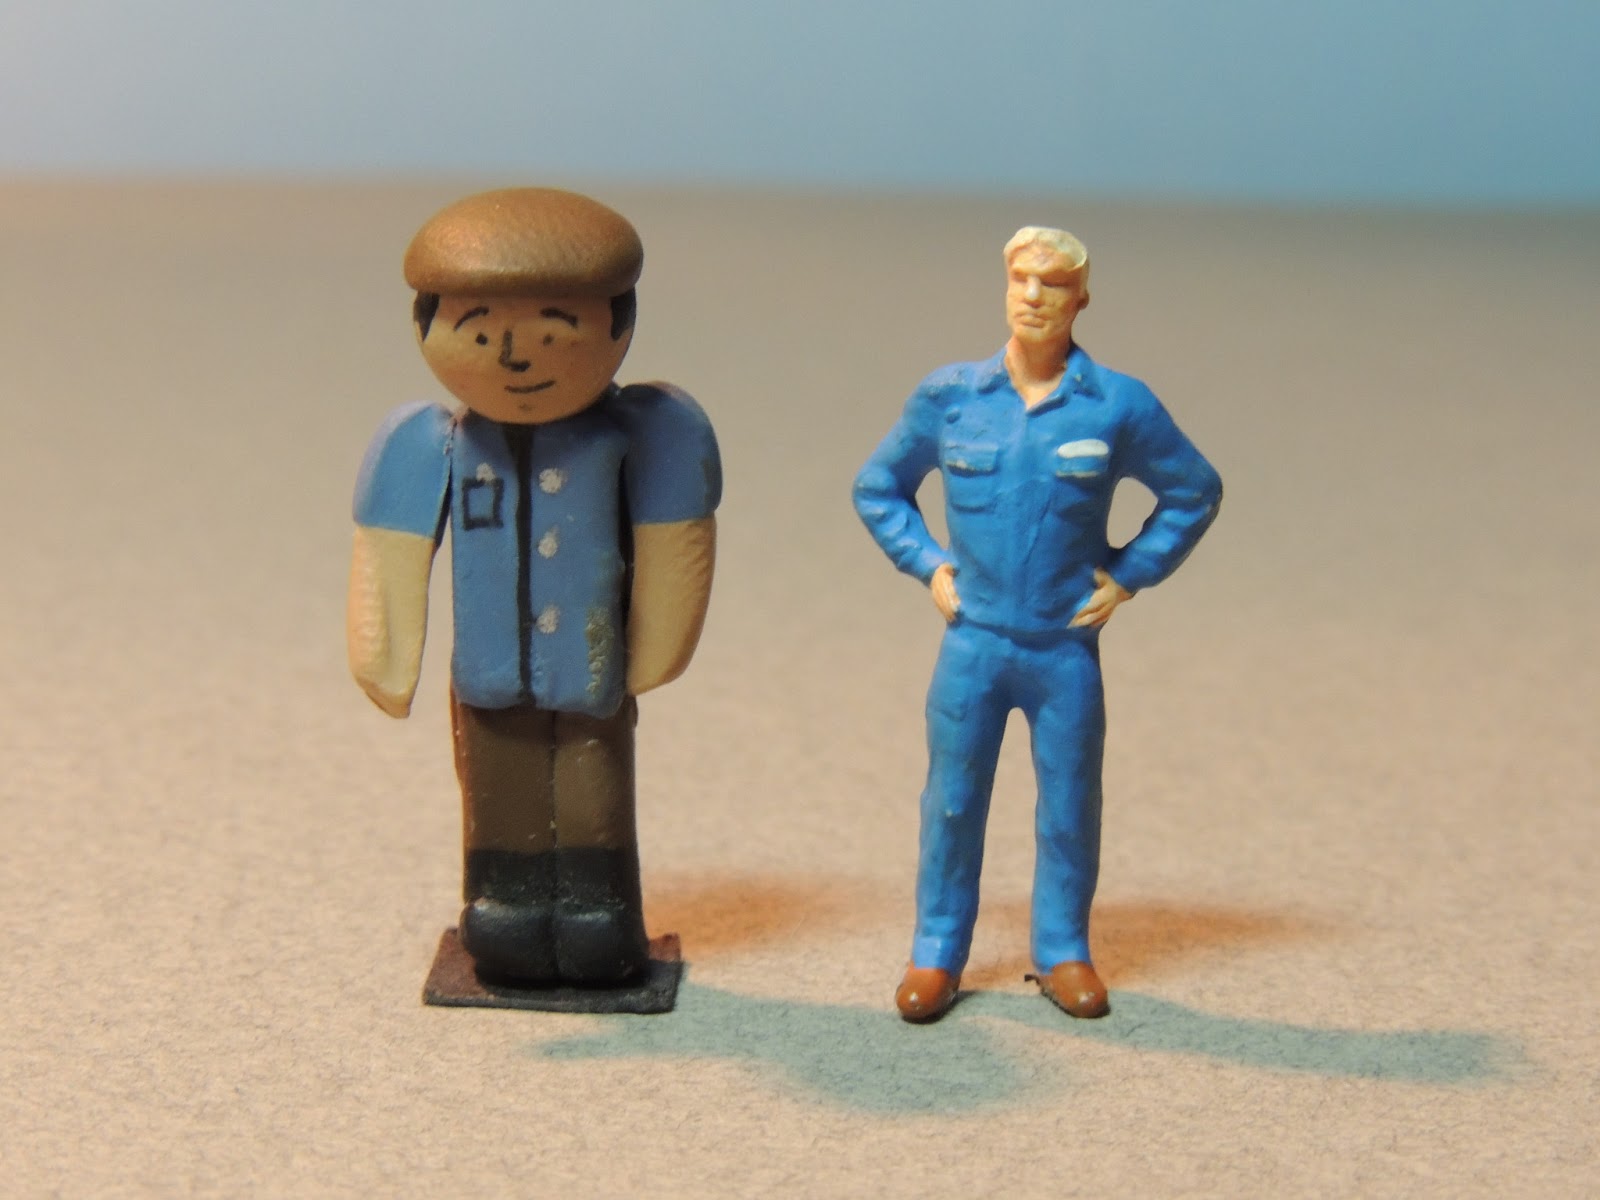
I used a Preiser Figure to see how I could make a Sculpy clay figure made similarly to the TV series.

I cut pieces of different colors: tan for the skin, brown for the pants and hat, and black for the boots, to pinch together and make the body.

After baking the figures for fifteen minutes in a 270 degree oven, and cooling them, I decorate them using ink pens for face and clothing, and gel pens for gold or silver buttons.

I found this to be a lot of fun, though it can be time consuming. There are so many possibilities for poses and themes, that I could actually make my own by studying from Preiser and Woodland Scenics figures.


Here are some yard workers, including Jem Cole! You may recognize the characters seen many times throughout the seasons in different locations. I also use Folk Art or Apple Barrel acrylic paint to decorate as well for any colors I can't get using just clay, such as the bandana for the man on the far right, or the undershirt shown from Jem Cole's overalls.


Here are dockside workers from Brendam. Sometimes they need to be sculpted for lifting or holding objects, such as the cargo shown, which are painted and weathered spare parts. Also for gestures such as giving out orders or waving.


This is Hornby's old baggage trolly, painted as is the spare chain and barrel. It would be smart to model a figure driving the trolly, or lifting the barrel off the cart.


Here is Sir Topham Hatt and his assistants! I modeled the hat separately and just tacked some clay to stick it on, so I could take it off in cases where he is seen without one! More well known poses, such as pointing, could be done by keeping the arms separate, then using clay or glue to change its positions, being able to make the arms stick to the body. Paper bases keep them upright, but I'd like to try Matte clear plastic so you won't notice the paper!


These figures are quite small, about 2.5 cm high. To give you an idea how that looks like, I placed on my worktable one of my Bachmann wagons I painted and weathered myself. Looks pretty accurate given the detail and scale reference? Let me know what you think.


How can you have a railway without drivers? Here are a few excited for their picture! It did take a while and a lot of practice to get the best results, such as the arms being free from the sides a little, and making the marks on the face. I'd also like to try to model the nose like the show did with their new figures from season 8 onwards.


There are a couple of drivers and firemen I designed to stand alongside my locomotives while they are running. Looks tricky right! Very easy tip:


I model these figures without one arm, and maybe have the head tilted a little, so they could squeezed on the cab-side, stuck on with a piece of clay shown.


I could have one or two on each side of an engine like Thomas as he passes by the camera for that added bit of realism I'm looking to capture for my video clips!


Sometimes I can use them on an engine like James or Henry, where they could lean out of the cab by sliding their sides down the doors with the arm holding them still, with a piece of clay which may be necessary to hold them into place while the engine runs.


Here is Sr Topham Hatt with his wife, Mrs. Lady Hatt, and their grand children, Stephen and Bridget!


Now for some passengers or pedestrians, businessman, mother and boys, a yardman and the grumpy policeman!


I also make a few props such as flags for the figures to hold. This man is the Lighthouse Keeper from "Something In the Air,"  with a turtleneck sweater and a cap.

There are more to make as there are so many figures I could model, but this gives you an idea how simple it actually is and rewarding it can be to make your own.