Showing posts with label Buildings & Structures. Show all posts

Wednesday, December 24, 2014

Tool Sheds #3: Yard & Quarry Huts

During the summer I was able to get back into making some more structures for the yard scenes, and here are a selection you may recognize from some of the newer and classic seasons of the Thomas show.


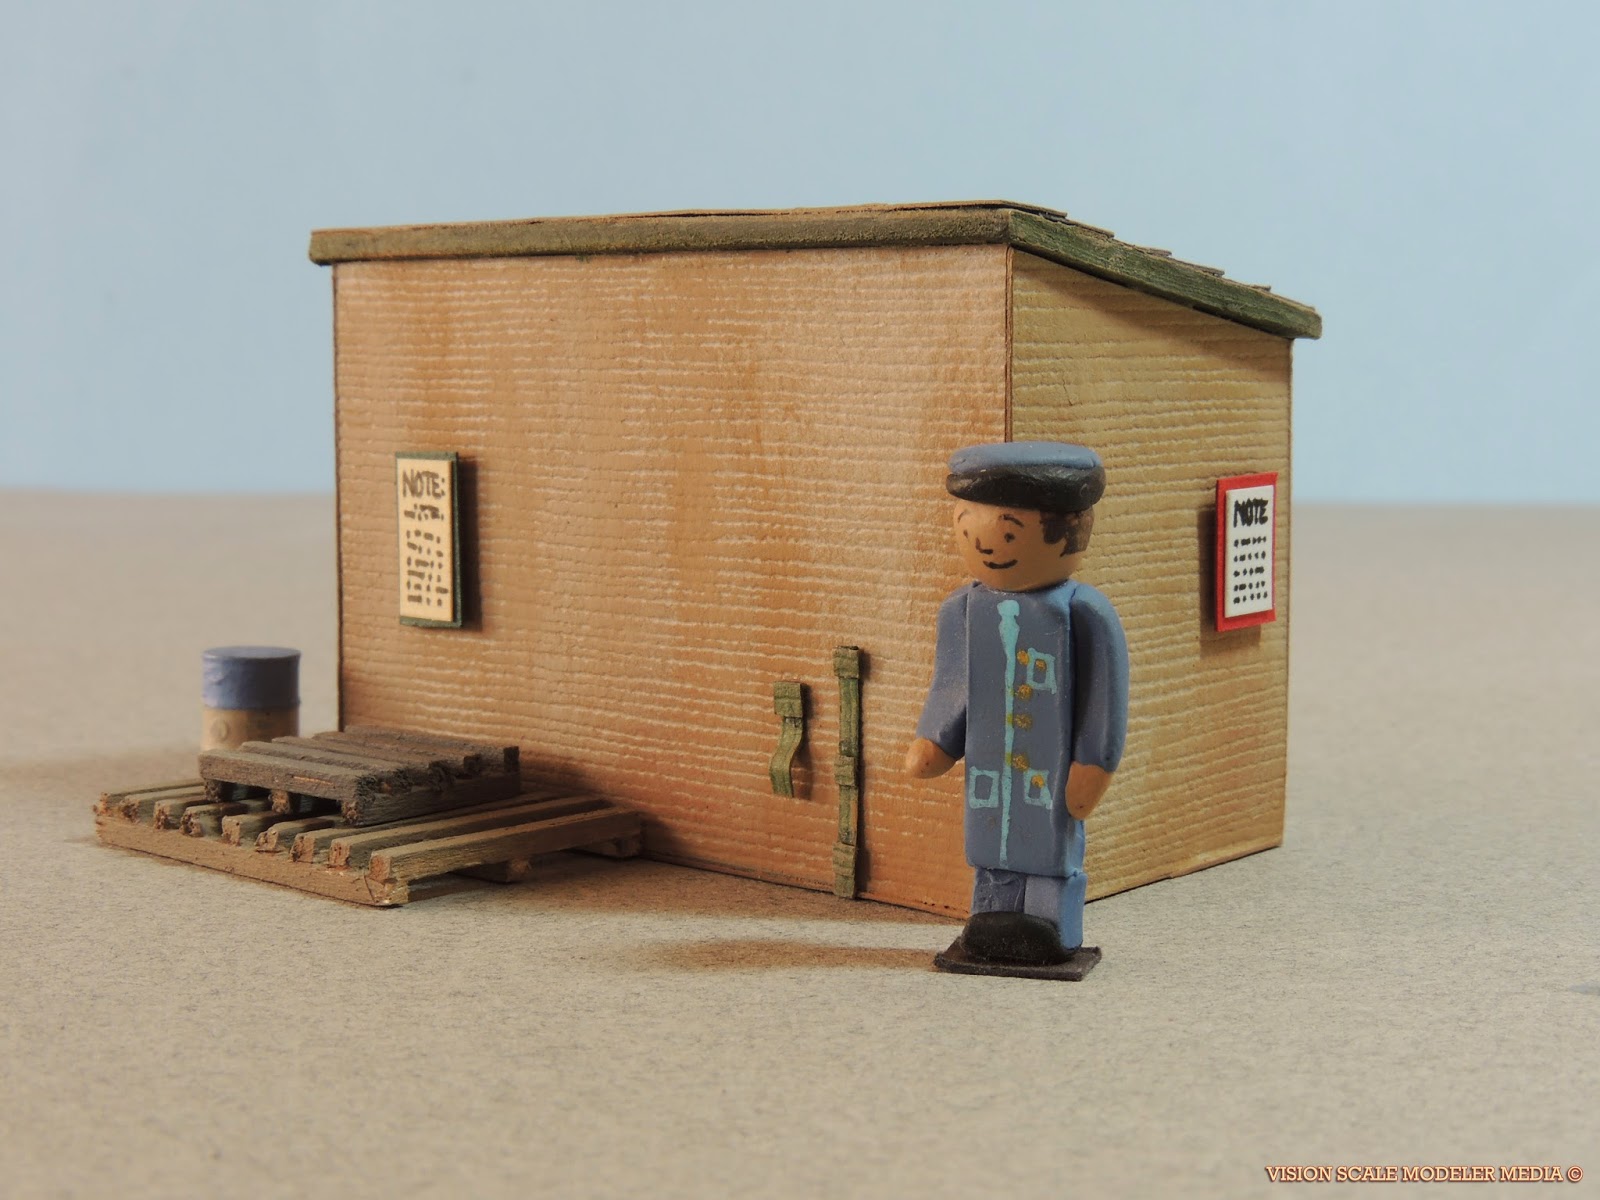
Here is the first one, a little yard office often seen from season 6, the collection of structures that were made since Thomas and The Magic Railroad. This building has also been seen at the quarry and Brendam Docks.

Since modeling the Knapford Goods Shed, I make singles from scratch using layered strips of cut textured card glued on the top for the roof, painted and weathered. I also used craft wire to make the drain ducts, with strips of paper wrapped and glued for the ribbons. Mounted on the walls are notices, and a work a force announcement for the crews at the back for extra detail.


Here is a small tool shed, often seen by refueling equipment next to the water columns and coal bunkers, weathered in a little dust for the quarry dioramas where there is a lot of gravel or sand.


You might recognize this one! This structure was made for the dioramas seen in seasons 1 and 2. The first batch of Wooden Railway buildings had included this structure along with the Tidmouth Signal Box. I also have a water hose-pipe at the back for when the structure is a stand-alone in the middle of a yard when not a lean-on next to a wall. There are also more notices and some scratch-built skids.

All of these buildings have hollow spaces underneath to add lights for filming the dioramas at night. I feel every time I try making more of these classic structures, keeping in mind everything I learned reading scale modeling magazines and websites, these buildings keep getting better and better. And that of course makes me very pleased indeed.

Tuesday, December 23, 2014

Railway Series Structures #1: Lorry Garage

I would often flip through the Railway Series books to find structures I can model aside from the TV series of the Thomas show. A few years back I modeled a shed that is seen in an illustration found in the "Toby the Tram Engine" book, in the story "James in a Mess." I liked the size and the little vents on top, so I thought I would try and give this building a shot.


I cam back to it recently and added some extra details. I took off the original plain roof, and added balsa wood to strengthen the structure inside. I then glued strips of textured card-stock for a metal roof, painted and weathered, with a little rust coming from the tiny smoke-vents.

Next I made a wooden gable with a spire at each end for an elegant touch, as the structure could be next to a station or a yard with buildings that have that extra bit of ornamentation.


I added bits of Woodland Scenics ground foam for a little bit of overgrowth along the base of the structure, in addition to mounted notices outside and inside. The lorry is one of Base Toys' models from eHattons I used for the Horrid Lorrys remake I made a while back. It fits nice and snug indoors, and is a great shed for any large open vehicles.

This was a good one. I would like to add a grill above the entrance that's seen in the illustration, but otherwise, I'm pretty happy with how it came out, ready for filming!

Tuesday, August 5, 2014

Tidmouth Signal Box #1


Here is today's newest scratch-built model, Tidmoth Yard's very own signal box. I'm calling my first version of these classic structures seen from the early episodes of the Thomas show, Box # 1.


David Mitton's model building team used this structure in many of their dioramas of various locations from seasons 1 and 2, in places such as Tidmouth Sheds, the entrance to Knapford Station terminus, and in Tidmouth Station's shunting yards. It was used with the wall having a stucco surface texture for Kirk Ronan's station in season 5, before it was remodeled for the newer seasons after the Thomas and the Magic Railroad movie. It was even featured painted in Tidmouth Shed's colors in season 6.


This project was on my mind for a while to draw into a blueprint, so one day I measured out the structure in centimeters, first as it looked in newer seasons.


I thought it would be a good idea to try and see if I can make this box as it appeared in the first seasons, with tan brick, Hunter Green trim, its cream woodwork, along with its maintenance porch in the front of the windows, and having another go at making a shingled roof!


At the back there is a single window, and I thought it would look nicer if it had a door at the corner, with a simple little notice posted next to it. This would allow the signalman to access the levers and mechanics, operated by the controls inside the upper room, to throw the switches and change the signals.


Here I did give it the stair case it had in newer seasons, the steps wrapping itself facing one way to the other, away from the track. All of the steps and handrails were made from scratch, and glued together, using painted balsa and card-stock.
The drainpipes were also scratch-built using craft wire, primed and painted, and attached to the walls with strips of thin paper wrapped around them, which would represent the fasteners. I think I really am getting better using this technique, as I like it much better than just using paper! They were also bent using pliers.


The maintenance porch in front of the windows would allow the signalman to climb onto it, and walk alongside the windows to clean the glass. You can even see the handle on the side windowsill!


For the roof I used the same technique I used on Knapford Station's Goods Shed to add shingles, painted using Plaid FolkArt and Apple Barrel acrylics to weather the textured surface, as I did with the whole structure.


Before I glued the roof into place, I took this picture to reveal the inside of the cabin, with cabinets, a clock above the table, and a LED spotlight wired into place to light the interior.


I built this little diorama to show you how the completed signal box looks at night fully lit inside! Even though the spotlight made it look a little brighter, I am happy with the result. This would be great to film for "the Flying Kipper," "Edward's Exploit" or "Wrong Road" when Henry and Edward travel past it on their late night train journeys.


Finally here it is basking in the sun as it rises in the morning dusk, the cars ready and waiting for their engines.
Hornby Skaledale made a cast resin version of this signal box a few years back. Here is is with good pictures from eHattons. It is still available in online hobby stores, and what you could do is to paint and weather it, simply adding on the maintenance porch, but I did want to try scratch-building it myself for obvious reasons. This structure came out beautifully, and I think it is one of my new favorites!

One thing I hope to do in the future is to try and use plastic textured card from Evergreen Scale Models, and kit-bashing Peco's Wills or Ratio kits for making the surface of the buildings. They also have textured plastic sheets. I'd recommend modeling structures using these kits as they are easy to paint and glue together, and they make great models for different scenes on the layout. There are more kits from these two brands, so Google them, and definitely give them a try! It gives beginners an easy start in quality scale modeling.

Happy Model Railroading!

Tuesday, June 17, 2014

Blueprints: Wellsworth Station

Wellsworth is the town on Sodor known as the stopping point at Edward's station before tackling Gordon Hill. These are measured drawings for the station buildings measured to be constructed in HO/OO Scale.


The model set built for Wellsworth was one of the first stations to premiere in the TV series of Thomas and Friends, and one of the most remembered as Edward's home from the Railway Series, the starting point for his coastal branchline to the seas at Brendam Docks. This is one of my favorite stations, and a great choice for Hornby's Scaledale and possibly even for Bachmann's new range of cast resin structures for their Thomas range!

Researching from photographs and video clips, I thought I would measure out drawings to make  the station's structures from scratch. The building seen above is the first station building, with a ticket office and waiting room. It has two floors, with a storage room in one half of the first floor for luggage, baggage equipment, and mail.


This is drawn to scale in centimeters. I like using a steel ruler to draw each measurement on the building, from the window panes to the width of the walls, using a 0.7mm technical pencil, with a Col-Erase pencil from Prismacolor for rendering the textures and shadows.


Here is the second station building with a waiting room. David Mitton's modeling team used this building without the rain canopy to double as Ffarquar station on Thomas' branch line in the TV Series. This station including Wellsworth had white windows, doors and canopies, which in newer seasons have been repainted hunter green when the cast resin model was refurbished and painted for season 6 onwards. At the back of this building, piles of ties and lumber along with tools are stored, where the track runs behind the station to Edward's big freight yard.

Thursday, January 9, 2014

Tool Sheds #2: Platelayers Hut


A newly completed plate-layer's hut at Tidmoth's Shunting Yards! This was a nice building to make, taking only a day to construct it and weather it, with a few nice accessories to share for this post.


For this tool shed, I wanted to make a building that could add interest in the yard. In addition to  experimenting more with my mix of brick colors, and adding a sloped gable-overhang to the shingled roof, I wanted to make some eye-catching details. In these pictures, I added posters on the sides, one for a notice and a timetable, each with cream paper and hunter green trim. I have them attached with rolled scotch tape so I could rearrange them.


I am especially happy with making these scratch-built fire buckets! At yards and stations, they are full of ether sand or water to put out fires or for other emergencies. I rolled a thin strip of card-stock around a brush handle and glued it to make the side of the bucket, then glued on a thin strip for the lip of the bucket, and the handles. I also glued it on a strip of paper and cut it for the base.


Two of the buckets are hung onto the wall of the shed with painted toothpick ends. One of the separate buckets on the ground has its handles down, and for the other bucket, its handle is up for these workmen to use! 


For this shed, those red buckets and signs add a nice spark of color that can be pleasing to look at on the layout, and these small details give buildings their own character and charm.


Until next time!

Thursday, January 2, 2014

Tidmoth Goods Shed #3: Completion


Here is the completed goods shed! All finished and ready for service. For the structures in the yards at Tidmoth, this would be good for storing coaches or mail cars, or to fix the wagons needing repair. For this post, here are some more pics for you to see.


In this view, you can see the weathered windows, the semi-columns in relief, and even the drain pipes, made both from card and some wood skewers. I liked making this effect for the Walthers Warehouse, as it made the drain pipes three-dimensional. Strips of card wrap around the "tube" to fasten it to the roof.


Here is the completed glass roof, and a picture showing it under construction. I made it from the A-frames, and glued more strips of balsa to make the window panes. Then I glued the clear styrene for the glass, and built the metal roof around it.


On the other side is the blank wall, with a close up of the small spires on the gables for railway ornamentation. As I plant this shed in my scenes, I can add a lean-on or side buildings, or show it on a different side, so I could use it in more than one diorama.


Thomas and James are shown here for some shots of the interior. They look nice under the light that shines into the shed from the glass roof. So do the A-frames and roof supports.


 Overall this was a great project, and I was glad to make buildings again. Using the foam core made this structure stronger and gave it depth, and it was fun creating the gables and the glass roof. I think as I make more drawings, I'll post them for you, and some more of the photographs from the sets I made in my room as I created them. Feel free to leave comments!

Happy Modeling!

Wednesday, January 1, 2014

Tidmoth Goods Shed #2: Body Shell


Here is the shed half completed. All that it needs is the roof! This shed it turning out better than I expected, so I am happy with it so far, and more will be shown soon of its progress.


Emily actually looks quite at home inside, and pretty realistic the way this shed is being modeled! Here in this picture, you can see the thickness of the foam core around the windows. I glued strips of brick-colored card to make it show the trim of the window frame's brickwork being unpainted, compared to the plastered walls, and wooden panel slapped on the lower half of the interior wall.


These A-frame girders turned out well, here being shown before they're covered up with the roof. Each rests on the semi-column of the wall.

After some thought, I decided to make two roof windows to let light inside, and this allows the viewer to look inside and see the intricate girders. It was fun making these things from scratch!


So were the wooden ends! Here, similarly to the carriage shed on the Skarloey railway, these painted wooden planks cover the A-frames on each end. Instead of paper, I tried using individual strips of balsa glued together on a card in the back, and used two pieces for the gable.

Half done, right now I am working on the roof and glass. That will be posted soon.

Tidmoth Goods Shed #1: Construction

A few days ago, I decided to make another goods shed, one that could be built for Tidmoth. So today, I wanted to post some photographs to show my construction process for this building.


I remember looking through some pages of a book of "The King of the Railway," and there was a 2-stall engine shed, where James, Emily, Gordon and Diesel were taking on water or being washed. It looked similar to some standard gauge sheds I've seen in seasons 4 and 5, and even the carriage shed on the Skarloey railway. It had a nice design, and it looked big and roomy for Percy's mail cars or either some coaches or wagons!

When I have an idea for a new structure, I sketch thumbnails and detailed drawings with measurements for construction. For this shed, I tried drawing doors, the three lamps seen in the illustration, and tried drawing two variations of how the side of the shed's wall would look.

So before New Year's Eve, I used the measurements in the drawings to start construction.


I decided to try something different for this shed. I had some spare foam core, so I cut them into strips, and measured out sections of the wooden semi-columns for gluing.


Then I drew the windows, and cut them out using my hobby knife. Now I can glue the wood in place with white glue.


I wanted to create a nicely detailed interior, which is just as important as the exterior! So I did the same process on the other side. I decided to have windows on only one side, as many goods sheds do in yards with walls or roads running along side it.


After the second wall was made, I placed Emily and some track between the walls to check and see how wide I wanted the shed to be. Now I can begin decorating!


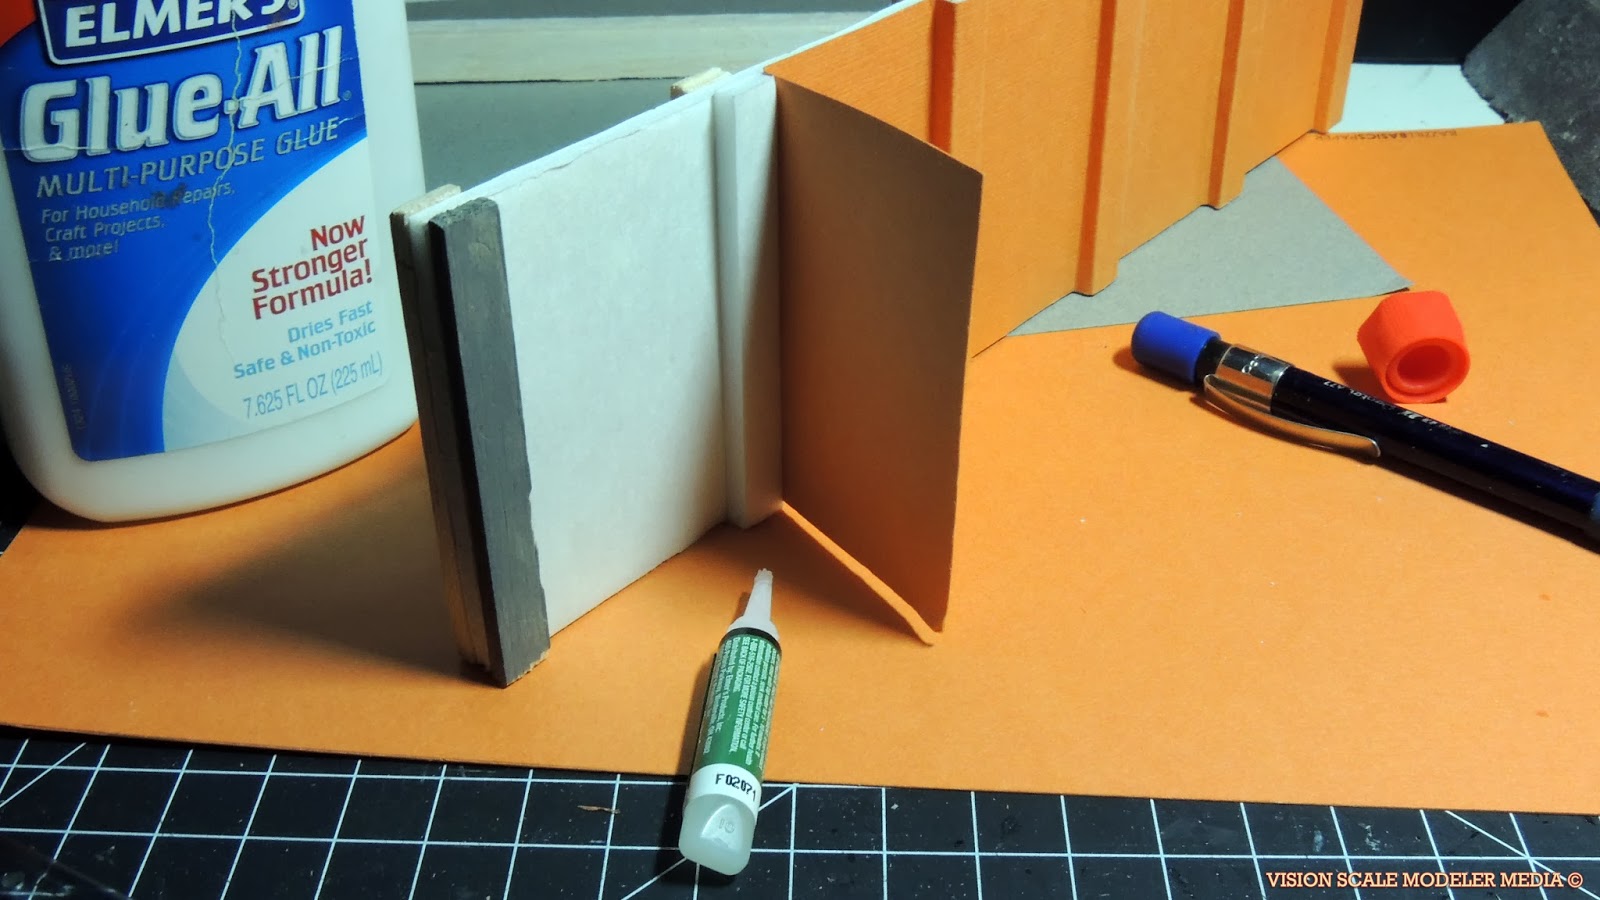
Using both white glue and super-glue for the tight edges, I folded and fixed strips of my textured card-stock around the plain wall on one side. It took a lot of folding and bending to get a snug fit. I think it might have been better if I had cut the strips separately, which would make the edges look sharper, not as round as they appear here.


I made separate strips for the other wall cut out for the windows, which were painted and glued on the back. This was tricky as I had to use narrower strips to make the layers of paper flat, which didn't turn out to be as deep as the wall on the other side. But after the clear plastic for the glass was put in place, and the layers of paper were made for the semi-columns, this wall actually turned out great.


Next I painted the interior. I used extra foam core for the semi-columns as I ran out of the flat wood strips, but this looked better. As I painted the paper of the foam core, and as there were wrinkles on the surface, it gave the illusion of plaster or concrete. The brick wall was wrapped and glued around the thickest columns on each end.


Finally I glued a strip of card around the bottom, for the trim running around the wall's foundation. Now I was ready to paint!

I mixed Folk Art paints for the bricks, the same mixed colors I used to paint the Walthers Warehouse. I used terracotta and a mixture of pink. as it was wet on the wall, I dry-brushed lighter shades, mixing in a linen color as I worked, which created depth. Then I did the same for the other side, weathering the window panes as I went.


The last thing I want to show for this post is the construction of the A-frames for the interior. I sketched a template to align the wood as I glued them together. The lowest cross-beam has card strips for the flush metal girder edges.

I used this technique for the Open Air Sheds, and I found excellent results using it for the Knapford Goods Shed; now I can use it to support the singled roof. Six of these were made, and after spraying them with primer and waiting for them to dry, I painted them using Hunter Green, the color I used for the windows and trim.

I hope you've enjoyed these photographs. The next post will show this shed closer to completion, so it will be uploaded soon.