Showing posts with label Brendam Docks. Show all posts

Tuesday, January 7, 2014

Brendam Docks Layout Plans

These are some drawings of a layout for Brendam Docks! If I was to make a huge layout, for this section of Sodor, these are a few sections of how I would like to see Brendam Modeled.

Carefully observing how the scenes were filmed on the dioramas of Brendam for Thomas' TV Series in seasons 2 - 10, I tried combining them together into one whole section of the main port, where you can see Cranky, the Sidings, the Unloading Bays in front of the Sodor Shiping Co. Building, and even the Passenger Unloading Dock where Evening Star is a welcome visitor. There is also the Ballast Unloading Dock, with its nearby open air shed, factory buildings, The Supply Shed, and a few other sheds, one by the sidings, by Cranky, and at the end of the quay.

The whole site is dotted with cranes, cargo, and sidings. I have modeled a couple of versions of this location a few times, yet as I come back to the TV series, even the Railway Series, I find intriguing details and beautiful shots I can draw to remember for the next time I model a layout. That is the beauty of making temporary dioramas! You can change or redo any location.


I found some beautiful photographs of the Ramsgate Harbor Railway Station, and a few models of the terminus on flickr, I thought it would be nice to draw Brendam's Passenger Station, seen in a few shots from seasons 2 - 4, just made up of Knapford's building props. This drawing has platforms for buses to pick up and drop off passengers, many benches on the quay for the people to enjoy the ocean view while they wait, and of course a large glass roof. A beautiful scene showing one of the harbor's ferries could be seen in "Gordon and the Gremlin" in season 5, one of Fulton's Car Ferries.


Finally this drawing shows what I perceive to be East Brendam, where Bill and Ben's branchline from the China Clay works connect to the Docks. This layout plan displays many of the scenes shown in season 3, with its tall warehouses and quay, cranes, and canal boats, from "All At Sea" and other episodes with Bill and Ben.

These were fun to draw! I hope you like these. Even if I break them up into smaller, temporary dioramas for photographs and video, these scenes seem to me that they would be beautiful models.


 Click here to see how I made the scenes of Brendam

Wednesday, August 14, 2013

Workman's Office #1


This is a building commonly seen at Tidmoth Sheds, Brendam, and Knapford Yards, well known for its large windows. I have been planning to make more structures seen in these locations by drawing their dimensions in my sketchbook, so in addition to the Knapford Goods Shed, here is the Workman's Hut.


As usual, it's made from Bazzill's textured card-stock paper, but this was when I began painting the paper and other parts in better, custom colors. Long pieces of balsa wood made the long, narrow structure shell bond together with extra strength, and smaller strips to glue the sides.

By the way, the decorative spikes on the gable is a toothpick cut in two!


At the yards and docks, dust and dry dirt stuck on the building's foundations and brick walls, so I used dry-brushing to realistically generate this weathering effect, using tans and light earth-toned colors mixed with the brick color for the walls.

The windows have clear plastic for the glass, super-glued to the back of the paper window panes to simulate glass. I found in the process of brushing thacross the whole front facade, the paint caught the doors as well as the window glass. I rather liked this effect, and although this building might be recently built, it was still exposed to aging and getting dusted by the trains or lorries passing by, the dust getting kicked onto the facade.


Similarly to the Open-Aired Shed, I created the roof using strips of card, cut in varying length, and glued them to be overlapped as steel planks.


Finally for the back, I have seen a rare photo of the building having only one door on this side, so I also added a drain pipe for the gutters.

I have also glued the building on a strip of card stock with a hollow rectangular opening, so I could install LED lights for nighttime scenes.

More coming soon!

Wednesday, July 3, 2013

Boats and Trawlers #1: Fishing Village

One Time I wanted to film scenes of the Fishing Village, so here are photographs of the set I made and the small fishing trawlers docked alongside the waterfront.


I used wooden planks, blocks and boxes to create the hill in the background, so I could lay the row of houses and terraces I made (from scratch with card-stock), in two rows with Woodland Scenics trees. The water is plexiglass laid on top of my green quilt for grass, the edges of the glass covered with garden pebbles. Here you can also see a good view of the painted wall of rolling hills and distant mountains my Dad and I painted for the landscape backdrop.


Here on my desk is the largest one of the fleet, "Burkett Fish." The body made with card-stock, mast with a wooden skewer, and a bit of thread to support it. Generous weathering for paint stains on the hull and bits of rust were added for the finishing touches.
You can also see how I made windows using ink squares drawn on the paper. Now I use clear plastic, and by far, it looks much more realistic, and it is much easier to use a craft knife for those delicate cuts! Crazy glue is used to glue it into place.


Here is the trawler on the set, dropping off some crates of seafood off for Stepney to take back to warehouses at Knapford Yards for the marketplace. This is a personal favorite, and it looked really nice on the waterfront alongside the Railway.


Here were the two smaller trawlers, "Rebecca" and "Susan Lee," simpler in design but are very good for background elements or of course adding variety to the scene, inspired by some of those found in Seasons 3 and 4. Also made from card.

Tuesday, May 14, 2013

Open Air Shed #1

I have tried a few times to make balsa wood designs of the open air sheds seen at the docks or at the yards at Tidmoth or Knapford. I wanted to share my latest model, the large 4-road shed seen in many episodes. So here are a couple of views of my model to share with you.


This shed is constructed using balsa wood. I usually build things from the ground up from beginning to finish, but in this case it was helpful to do a sketch of the tresses and supports to align them together snugly and with more precise cuts. I painted it using green mixed with brown and grey to give it its look as it was on the set.


As you can see of the finished product, I thought this shed would be great for interior shots of freight cars or engines inside, maybe when I find appropriate lamps I could also light the interior. Of course I needed to make sure that the tresses for the peaks were repeatedly made so each matched with accuracy. So I tried a new technique to create a strong shell:
  • I cut a nice, flat, new sheet of wrap paper and taped it to my table top. 
  • Then I glued each tress piece of balsa wood by piece using Elmer's white glue.
  • Finally I taped each to the wax paper so the beams can sit still as the glue can work as it dried to bind the beams together.
Constructing the beams this way for the peaks allowed me to assemble the long crossbeams on the side, so I can glue the four peaks on the four sections. The picture above shows a smaller, older one I was reconstructing so you can get an idea how it looks. The grey is spray primer.


For the roof, I cut long sections of card-stock paper, varying the length of each, as the metal roofing, I layered different sections together. I find this to be a nice approach to make realistic metal roofs. Later after the glue dries, I can dry-brush a light grey color and rust color to weather it, maybe with some scraped pastel dust.


Here is how the completed shed looks with a fuel tanker and three Dapol gunpowder vans shunted inside. It can house a total of sixteen wagons, with four on each road.

This is the largest and strongest open air shed, and as there are many different possibilities of designing these sheds alongside buildings, or with mobile cranes inside, I hope to experiment how I make them using real photographs or books as a reference.

Sunday, April 14, 2013

Behind the Scenes: Brendam Docks

The Docks have been a common theme for my last two uploads, so to fulfill requests, here are some photographs of this set and how I made them:


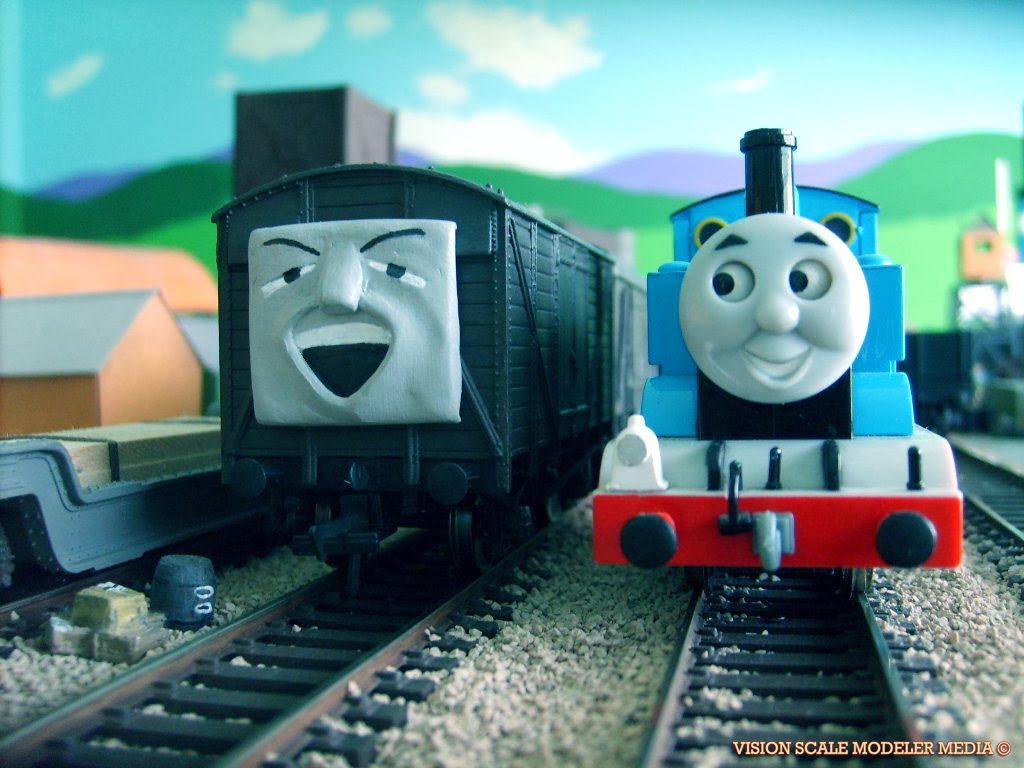
This is a photograph based on the opening sequence of "Horrid Lorry." Just like the Narrow Gauge engunes such as Sir Handel, Rheneas and Skarloey, all of the buildings, open-aired sheds, cranes and ships are made of card-stock, glued and assembled together. Even the clay figures I've sculpted myself (more on that on another post, stay tuned!). Gordon is shunting Bachmann Branchline Vans in the siding.


Here is one of the ships. This was featured many times as different characters on TUGS, and it took quite a bit of searching to find the right pictures to work from, but it was well worth the extra effort!

This ship is also made of card-stock paper! Balsa wood was used for the masts, with black thread to tie them together and decorate them. Glass is plastic egg carton, so you can see the interior. The ship in the background has a light, and you can see it in the previous posts and in "Something in the Air," and "Cranky Bugs!"

 
Here's Percy, waiting for his cars to be coupled. The chain is a spare Lego chain.


Here is also the Salvage Barge seen in Thomas' "Horrid Lorry" and "Bulstrode" episodes. The crane's cab can turn, and the arm is adjustable, too.


From the Flying Kipper scene, here are some open wagons from Bachmann Brachline, and of course the Ertl die-cast Crosby Truck! I used lights for the night scenes in warehouses and sheds. This one in particular is from the original "Flying Kipper" Railway Series illustration, with its long platform.


These pictures are from Tidmoth Yards, but shown are the cargo I have modeled and made from scratch out of card-stock paper. The skids are painted and weathered balsa wood strips, with many painted spare parts and Woodland Scenics kits. You can also see a better view of the tiny HO scale clay figures I have made from Sculpy clay.
 

Here is a clay face I made for one of the vans! First getting the vans, I really wanted to see what they would look like with a face on. So studying from the pictures here, I sculpted and carved the face using Sculpy. I think this is the best Troublesome Truck face I ever did!

 
I will be posting "Horrid Lorry" in a week after my collage classes, so you can see more of the lorries on these flatbeds! Each are Base Toys from ehattons.com, and I even made their classic faces too.

Happy Modelling!

Homemade "Cranky Bugs" Uploaded on YouTube

Cranky Bugs has always been one of my favorite episodes, and I wanted to capture my own clips in  my layout room years ago. Now I compiled everything together so you can see it for yourself!


Also posted here are pictures I took when filming, the famous closing shot of Cranky happily loading Thomas and Percy's trains, as they look on much appreciated to see him change his attitude for a while!

There's Something in the Air!

I have been going through my footage from long ago, and I've put together a full episode! It's "Something in the Air," and more will be coming soon, so stay tuned!


Below are photographs I took of the sets while filming. First is the signal box seen in an illustration from the original "Old Iron" Railway Series book. There is an electric light installed, in the evening moonlight shining from a large office lamp.


At the Docks as Henry apologizes to Thomas. In these sequences I animated the eyes using an old Paint Shop Pro software called Animation Shop.

Enjoy!

Saturday, April 13, 2013

Behind the Scenes: The "Flying Kipper's" Rolling Crane

A viewer recently asked how I made the crane in the Flying kipper sequence. The rolling crane has always been one of my favorites, so here are the photographs:


Studying from the video, I made the main body out of balsa wood, using the Atlas track knife to make smooth cuts. White glue was all that was needed for assembly. the crane's base is the grey card-stock.


I must say it was a challenge to make the wheels!

I wrapped strips of card-stock around a pen, then glued it together. Next I glued the roll onto paper, then cut it into a larger circle on each end to make the roll into a wheel.

I had to punch into the wheel holes to insert the axle into place, which is made out of cut toothpicks! Gluing the axle onto the axle boxes, leaving the wheels unglued, allowed the wheels to actually roll!

This was tough, but it was well worth the effort:


Here is the finished product! I made the cab the same way as I do with the buildings, assembling it with tape and using balsa wood braces to make it square. I also made the crane hoist out of wood and paper. You can also see both the cranes I made based on those used at Brendam Docks' quayside, as well as the warehouse seen in the original "Flying Kipper" story in the Railway series.

The track which the crane rolls on is also made from balsa wood. This allows the crane to cover longer distances as it loads the trains and ships with their cargo.


So this is how I got the crane to move. I taped fishing line onto the base of the wheel supports...


...Then looped the string around the coupler of an engine for very smooth motion. This worked really well and it came out beautifully in the final footage...


As a special surprise, here is a picture I took while filming the scene. Henry looks on as the workers load the fish into his Bachmann Branchline and Dapol vans, the light from the ship's cab flaring, cargo lying alongside the track, and the moonlight generated from a large office lamp looms over the quay. I put a light in the ship and controlled it with a cheep remote controller.

If only I had fog!


This scene is actually from "Thomas and the Spaceship," when Thomas was trundling along the forest with his long line of mail cars. That reminds me of those gorgeous promotional posters of Thomas and the Magic Railroad, and how beautifully modeled the diorama was made with the colorful lighting. Cool stuff!

There is a long, thin wooden plank wit a strip of textured green paper, which lies underneath the loosely ballasted track and protects the afghan quilt. I usually just lie the track on the quilt I use for the countryside, especially for branchline scenes, but for mainline sets like this, I had tried using this method, which looks much nicer! The Woodland Scenics Trees have their bases popped in place through the large holes of the quilt, and the dark green lichen is from A.C. Moore craft store.

Never Stop Creating!