Thursday, August 15, 2013

Yard Wall: Made from a Duran Stick!


I was looking around my Father's supply of wood and tools from the garage, and I noticed there were a few Duran paint sticks. I though these could make long walls to divide the yard from the scenery. I'll share with its construction, which took about thirty minutes to make.

  • I cut several strips of balsa wood to make the raised dividers, and had them glued to the Duran stick.
  • Next I cut long strips of my textured card-stock to the stick's height, and glued it to the wall.
  • I mixed acrylics to make various brick colors to paint on the paper, and then weathered it using lighter colors.
  •  A long strip of balsa was cut and glued on the edge, for the wall's trim on top, and glued a long card strip to texture it.
  • Finally, squares of card were glued on the trim for the wall's caps.

Sometimes there are wires that run along walls to power yard equipment, from signals to lights. For a finishing touch, I added wire that was painted and bent using pliers to fit snug onto the dividers, and glued rolled paper to add fasteners. The generator was a spare part I found and painted, then it was taped to the wall so I could take it off and use it for something else if I wanted to.


You can get an idea how it looks as a great compositional element in this photo. With the balsa dividers, the Duran stick stood well upright by itself. If I made more for a diorama, they can be braced, glued along hills and textured, maybe a few doors and gates for people and vehicles. Maybe there could be a gate made with a metal decorative arch, over iron doors, which say Tidmoth!

So if I make a batch of these glued in different lengths, they will look nice used for Knapford Yards, Wellsworth or the Harbor. This method of using sticks could also be used to make the brick facade on docks.

Placed flat, these can be made into low, freight loading platforms for wagons in the sidings, warehouses, or transfer yards.

Wednesday, August 14, 2013

Workman's Office #1


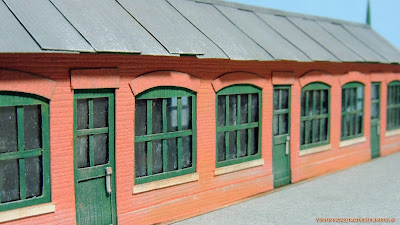
This is a building commonly seen at Tidmoth Sheds, Brendam, and Knapford Yards, well known for its large windows. I have been planning to make more structures seen in these locations by drawing their dimensions in my sketchbook, so in addition to the Knapford Goods Shed, here is the Workman's Hut.


As usual, it's made from Bazzill's textured card-stock paper, but this was when I began painting the paper and other parts in better, custom colors. Long pieces of balsa wood made the long, narrow structure shell bond together with extra strength, and smaller strips to glue the sides.

By the way, the decorative spikes on the gable is a toothpick cut in two!


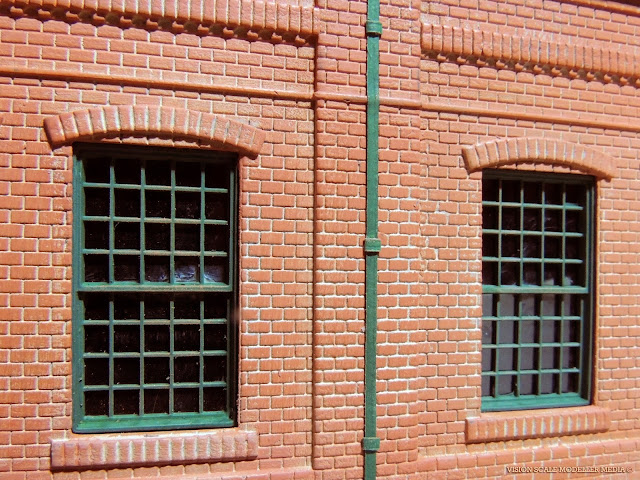
At the yards and docks, dust and dry dirt stuck on the building's foundations and brick walls, so I used dry-brushing to realistically generate this weathering effect, using tans and light earth-toned colors mixed with the brick color for the walls.

The windows have clear plastic for the glass, super-glued to the back of the paper window panes to simulate glass. I found in the process of brushing thacross the whole front facade, the paint caught the doors as well as the window glass. I rather liked this effect, and although this building might be recently built, it was still exposed to aging and getting dusted by the trains or lorries passing by, the dust getting kicked onto the facade.


Similarly to the Open-Aired Shed, I created the roof using strips of card, cut in varying length, and glued them to be overlapped as steel planks.


Finally for the back, I have seen a rare photo of the building having only one door on this side, so I also added a drain pipe for the gutters.

I have also glued the building on a strip of card stock with a hollow rectangular opening, so I could install LED lights for nighttime scenes.

More coming soon!

Wednesday, August 7, 2013

How To Paint Realistic Brick Structures


Reading some articles on various modelling blogs, I came across very useful tips to create a realistically painted brick surface for model buildings. I organized what I know into this post in simple steps for you modellers to keep for future projects:
  1. Mix together tan or any light shade of earthy colors acrylics, then paint the plastic to create the color for concrete mortar. As you paint, add blotches of mixed variations on the wall for variety. Then let the paint dry.
  2. Now you want to create the brick. Dry-brush very lightly on the raised brick texture on the plastic, careful not to paint into the mortar. Have many shades of red mixed in sections on your mixing surface, an egg-carton or pallet, gives a very "natural" appearance that make a very pleasing result as you paint for extreme realism.
  3. After this layer of paint dries, mix lighter shades of red, and dry-brush again to create depth.
  4. Finally weather the building using more dry-brushing acrylic scraped pastels for rust, quarry dust and coal ash, and any element of being exposed to its specific industrial location or nature's elements.
It was amazing when I tried this with the Walther's warehouse, and I recommend trying it yourself for whatever building you make. Try reading more articles in magazines and online for modelling tutorials, and it helps to study from real life. I guarantee with a bit of practice and patience, you will see amazing results.

Happy modelling! 

Kitbashed Lean-On Warehouse


I was cleaning and organizing my boxes full of old model railway kits and parts, and I found two spare sides to the Walther's 2-Stall Engine Shed. I wondered what I could make with them, and as my model-making skills were getting better, I thought I'd try creating the building in this post.

The front wall you see is made up of two separate pieces with gaps for windows. These were sprayed with primer and sat on the table to dry. I wasn't sure what to make with them, but I finally landed on an interesting idea.

Quite often in the classic TV Series of Thomas and Friends, you will notice that the Freight Shelter Sheds that make up the left side of Knapford Station were used quite often in other sets. They became warehouses built up with dividing yard walls, to either direct the eye around the yard dioramas, or just hide the table edge and scenic supports for these sets. I decided to make a larger version in red brick color with some modifications.


The wall pieces were glued together and braced using white glue, Crazy glue, and balsa wood sticks. Here you can see one of the angled size walls, made with my textured card-stock paper. I used acrylic colors mixed to paint the entire building, so the paper and plastic parts match perfectly with weathering. It is wood-looking texture verses molded brick, but this would be used in a background scene or for close up shots with lots of detail, so this can be distracted with posters or leaning parts on the set.


Some of the window pieces were missing, so to give variety and character to the building, I made boarded windows on two sections of the wall, again using card-stock. There are gaps between the boards to be seen through when the interior is lit. These and the molded plastic windows were painted green, and glued after the brick was painted.


For the first time I also used metal wire to create gutters. It was cut with pliers, painted, and attached by wrapping paper strips around the brick edge to glue it. It looks so much better than flat paper strips, but you can see I combined both to model it with realism and depth in mind.


Looking inside, there are two warehouse doors made from scratch, again using card-stock paper that has been weathered. I thought this would be great to add when I have it wired with LED lights for a lit interior, then I can add or rearrange cargo and other details inside for realism.


That is why I made the roof bendable, so I can access the inside later. Strips of card-stock were glued in layers, then weathered by dry-brushing using acrylics.


So here you go. I placed it on my table with Percy, and some spare parts to show you how it looks on set. I feel happy with the result. As I try modelling using model railroading kits again, I'll think about customizing them by always painting the plastic parts first, and then add or change details to make them personally unique, so they don't look store-bought or toy-like.

I think I'll add three smokestacks, either the thin metal tube type, or brick for interior boilers...

Until next time!